
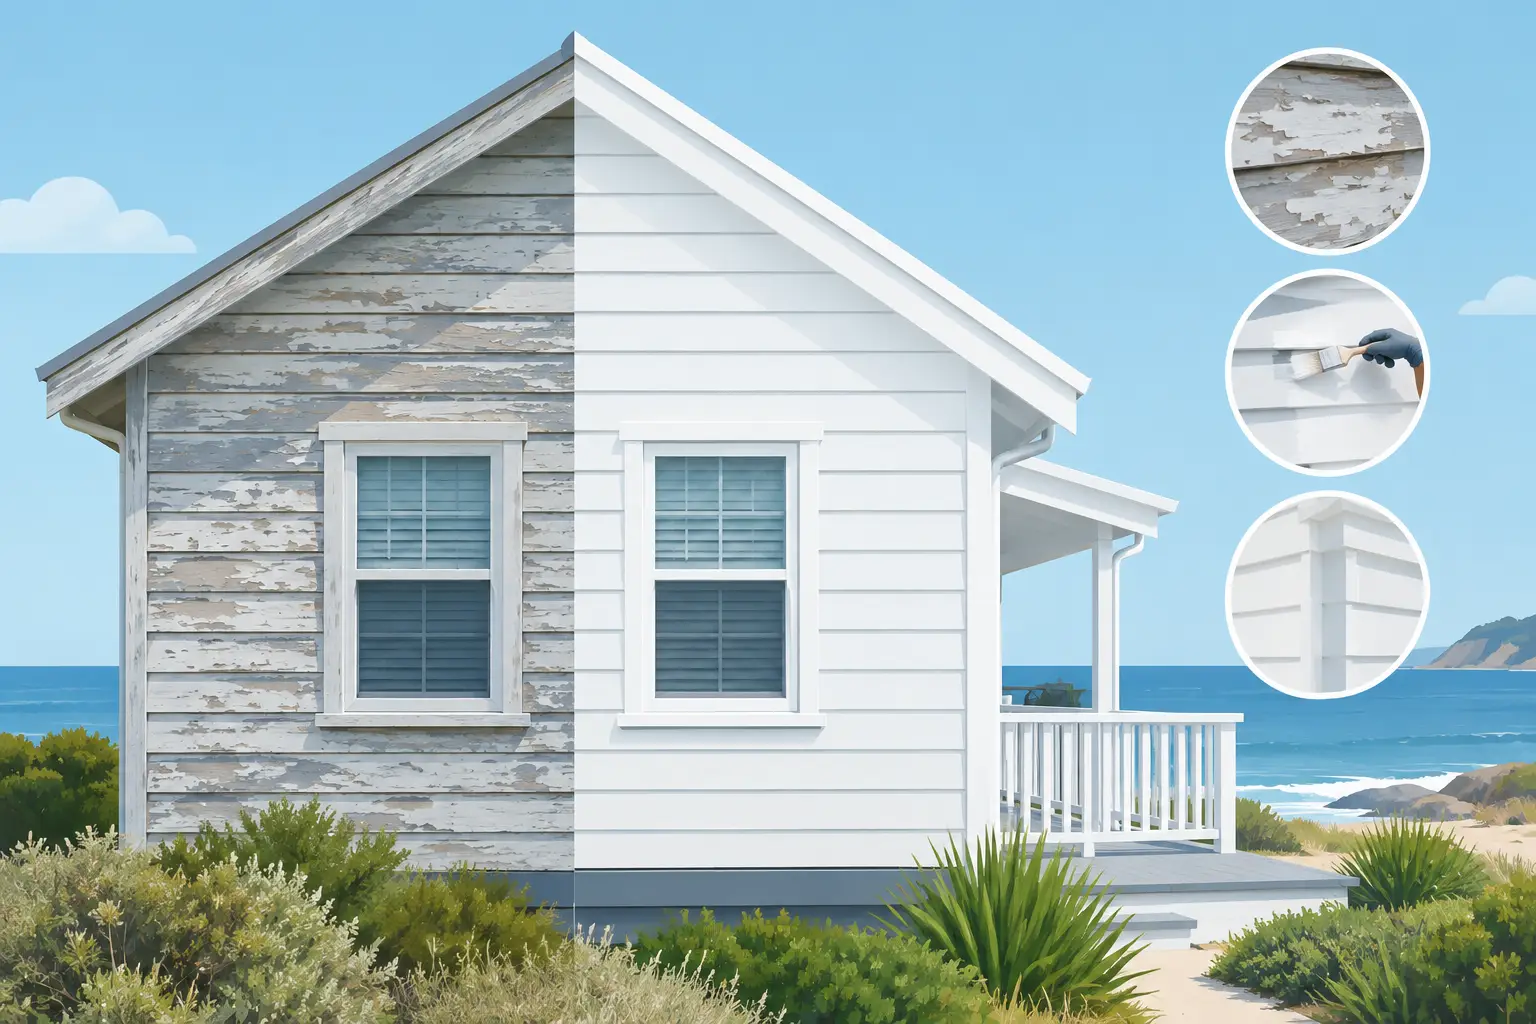
A faded weatherboard home can look like it only needs a fresh coat of paint. Often, the paint failure is the visible symptom of a bigger issue: open joints, softened timber, exposed nail heads, or moisture finding its way behind the boards. This weatherboard restoration example shows what a professional exterior transformation should involve, especially for homes exposed to salt air, sun, and changing weather conditions.
For Northern Beaches homeowners, restoration is not simply about choosing a more appealing color. It is a chance to protect the home’s exterior, correct small defects before they spread, and achieve a clean finish that suits the character of the property.
The Starting Point: A Tired but Repairable Exterior
Consider a typical older coastal weatherboard home. The facade has a patchy finish, with paint peeling along window trims and lower wall sections. Several boards have begun to cup slightly, a few nail heads are rusting through, and fine cracks are visible where trim meets cladding. The front elevation still has charm, but it no longer presents as well as it should.
At this stage, some homeowners consider painting over the problem to improve the look quickly. That can provide a short-term change, but it rarely produces a lasting result. New paint needs a sound, dry, stable surface beneath it. If loose coatings, failed caulking, or deteriorated timber remain, those issues will soon show through the new finish.
A proper assessment separates what can be restored from what needs replacement. Most weatherboard homes do not require every board to be removed. The right approach is targeted: retain sound timber, repair localized damage, replace boards that have lost structural integrity, then prepare every surface consistently.
A Weatherboard Restoration Example, Step by Step
The visible paintwork is the final stage of the job, not the whole job. In this example, the work begins with a close inspection of the weatherboards, eaves, trims, fascia boards, window surrounds, and areas near gutters and downpipes.
Protecting the property before work begins
A well-run project should be organized before preparation starts. Paths, garden beds, windows, outdoor furniture, and entry areas need to be protected. Access points should remain tidy and practical, particularly when the family is living in the home during the project.
For an exterior restoration, clean work practices matter as much as the finished appearance. Paint flakes and sanding dust should be contained and removed regularly, rather than allowed to collect around the property. Clear communication also helps homeowners know when windows may need to remain closed or when access around certain areas will be limited.
Removing failed paint and preparing the timber
Loose and flaking paint is scraped back to a firm edge. Depending on the condition of the home, sanding may be needed to smooth rough areas, feather the remaining paint edges, and give new coatings an even surface to grip.
This is where shortcuts become obvious later. A surface that is painted before it is properly cleaned and sanded may look acceptable on completion day, then begin peeling well before it should. Preparation takes time, but it directly affects adhesion, smoothness, and durability.
Mildew, chalking, dirt, and salt residue also need to be addressed. Coastal homes in areas such as Manly, Dee Why, Mona Vale, and Narrabeen Beach can experience more environmental exposure than sheltered inland properties. The exact cleaning method depends on the existing coating and the condition of the timber, but the goal is the same: a clean, dry surface ready for repair and primer.
Repairing boards, trims, and gaps
Once loose paint has been removed, the true condition of the timber is easier to see. Minor surface imperfections can often be filled and sanded. Small gaps around trim may be recaulked with a suitable exterior product. Rusted nails may need attention so stains do not bleed back through the fresh paint.
Boards with significant rot, splitting, or movement should be replaced rather than filled. Filler has a role in finishing small imperfections, but it is not a substitute for sound timber. Replacing only the affected boards is often the sensible balance between cost and long-term performance.
Careful repair work also preserves the home’s original lines. Weatherboards rely on neat overlaps, clean edges, and consistent spacing to look right. Poorly fitted replacement pieces can stand out even after painting, which is why detail-focused carpentry and paint preparation need to work together.
Priming exposed areas correctly
Bare timber, repairs, and stained areas require the right primer before topcoats are applied. Primer improves adhesion and helps create a consistent base, so the finished color looks even across both old and newly repaired sections.
This step is especially valuable where paint has been scraped back extensively or replacement boards have been installed. Skipping spot priming can lead to uneven sheen, visible patchiness, or premature coating failure. The right product selection depends on the surface and existing paint system, which is why an on-site assessment is more reliable than a one-size-fits-all recommendation.
Applying a durable exterior finish
With preparation complete, the home is ready for finish coats. Exterior paint should be selected for local conditions, the condition of the substrate, and the desired sheen level. A lower-sheen finish can soften the look of older weatherboards and hide minor texture, while semi-gloss is often practical for trims, doors, and fascia because it is easier to clean and gives crisp definition.
In this example, a warm off-white is used on the weatherboards, paired with a deeper neutral trim color. The lighter main color reflects heat and gives the facade a refreshed coastal appearance without making the home feel stark. Darker trim adds structure around windows and the entry, while allowing the details of the original architecture to stand out.
The number of coats and application method will depend on the product specification and the surface condition. What should not change is the standard of application: even coverage, sharp cut-in lines, no missed edges, and attention to the areas where water and sun place the greatest demand on the coating.
What Changed Beyond the Color
The completed home looks brighter, cleaner, and more cohesive from the street. Yet the more valuable change is less obvious. Damaged boards have been addressed, vulnerable gaps have been sealed, exposed timber has been primed, and the exterior now has a protective coating system designed to perform as well as it looks.
This is why a weatherboard restoration can add more value than a simple cosmetic repaint. It helps homeowners stay ahead of more expensive timber deterioration and makes routine maintenance easier to manage. For landlords and property managers, it can also improve first impressions and protect the presentation of the property between tenancies.
There is still a trade-off to consider. Full restoration costs more than painting over sound-looking but poorly prepared surfaces, because repairs and preparation require skilled labor. However, the cheaper option can become more expensive if peeling paint, trapped moisture, or timber damage forces another repaint sooner than expected.
How to Keep Restored Weatherboards Looking Their Best
A quality paint job benefits from regular observation. Walk around the home at least once or twice a year, paying close attention to exposed elevations, window sills, fascia boards, and boards near ground level. Look for cracking caulk, peeling edges, water stains, and areas where garden growth keeps timber damp.
Keeping gutters clear and directing water away from the walls can make a real difference. So can trimming back vegetation that rubs against painted surfaces or restricts airflow. Small maintenance items are far easier to address before they affect multiple boards.
The repainting schedule will vary with sun exposure, product quality, previous preparation, and the home’s proximity to the coast. Rather than relying on a fixed number of years, assess the condition of the coating. A timely maintenance repaint can preserve the timber underneath and avoid a more involved restoration later.
For homeowners planning work, the useful question is not only, “What color should we choose?” It is, “What does the exterior need before paint goes on?” A careful answer to that question is what turns a welcome visual refresh into protection that lasts.